
A Beginner’s Guide to Installing 100×240 cm Granite Slabs
Updated: Mar 26, 2025
Dreaming of a stunning granite slab wall but scared to tackle the project yourself? Many homeowners feel intimidated by the thought of installing such big tiles. But don’t worry! This guide breaks down the process into simple steps. You’ll learn how to install 100×240 cm granite slabs like a pro. We’ll cover everything from planning to the finishing touches. Get ready to transform your space with confidence.Mauritius Ranking
Planning & Preparation: Setting the Stage for Success
Good preparation is key to any successful project. It prevents mistakes and saves time. Let’s get started with the planning.executive director roles in India
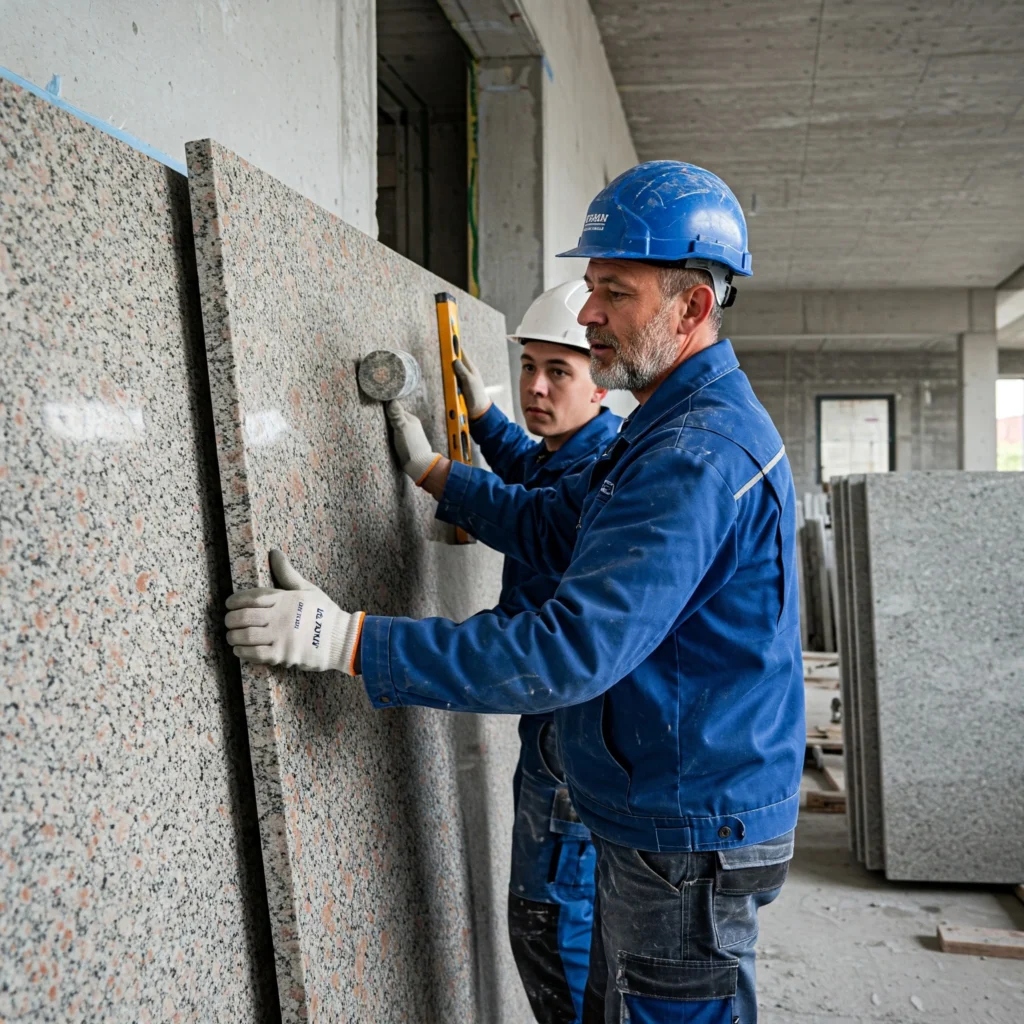
Measuring & Layout: Precision is Key
First, measure your wall space very carefully. Then, consider the size of your granite slabs (100×240 cm). Plan how the slabs will fit, including grout lines. A grout line is the space between tiles. This is normally about 1/8″ to 1/4″. Planning ensures you minimize waste from cutting tiles.
What about outlets and windows? Those things need extra consideration. Use a laser level to draw straight lines. This simple tool guarantees your tiles are perfectly aligned.
Surface Preparation: Ensuring a Solid Foundation
Your wall surface must be ready to hold heavy granite. It needs to be clean, flat, and sturdy. Different walls, like drywall or concrete, need different prep work. Drywall requires a cement board underlayment. For concrete, you want to grind down any high spots for a good, flat surface.
Got cracks or holes? Patch them up! Apply a primer or sealant after. This helps the thin-set mortar stick better. Also, it can protect the wall from moisture. A smooth surface is a must for a lasting installation. Eco-luxury safaris in Africa
Material Selection: Choosing the Right Supplies
Picking the right materials makes all the difference. You will need thin-set mortar, grout, and sealant. These need to be suitable for granite slabs. Think about how much the slabs weigh and if the wall is exposed to water. Conservation-focused safaris in India
There are different types of thin-set. Some are better for heavy tiles. It’s a smart idea to ask a tile expert. They can suggest the best products for your specific needs.top corporate leaders in india
Related Blogs: How Tiles Can Make Your Room Look Larger
Installation: Step-by-Step Granite Slab Mastery
Okay, now it’s time to get to work! Follow these steps for a smooth installation.
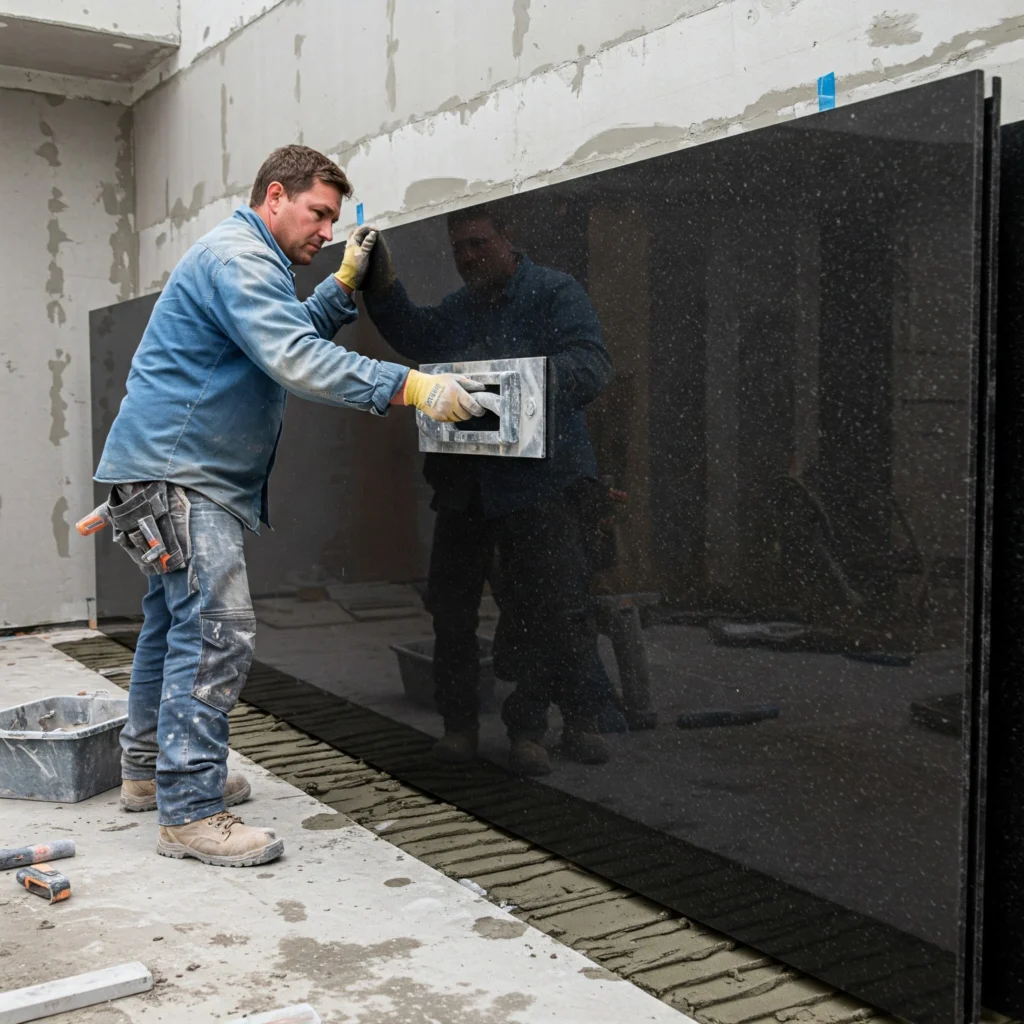
Applying Thin-Set Mortar: The Art of Adhesion
Mix your thin-set mortar according to the instructions. Get the mix right, and the granite will stick well. Grab the right size trowel. This makes sure you spread the mortar evenly. Apply mortar to the wall and the back of the slab. That’s called back buttering.
Work in small areas because mortar dries quickly. Apply the mortar to an area that is only slightly bigger than your slab. This prevents the mortar from drying before you can set the granite. Flock Fabric Supplier in delhi
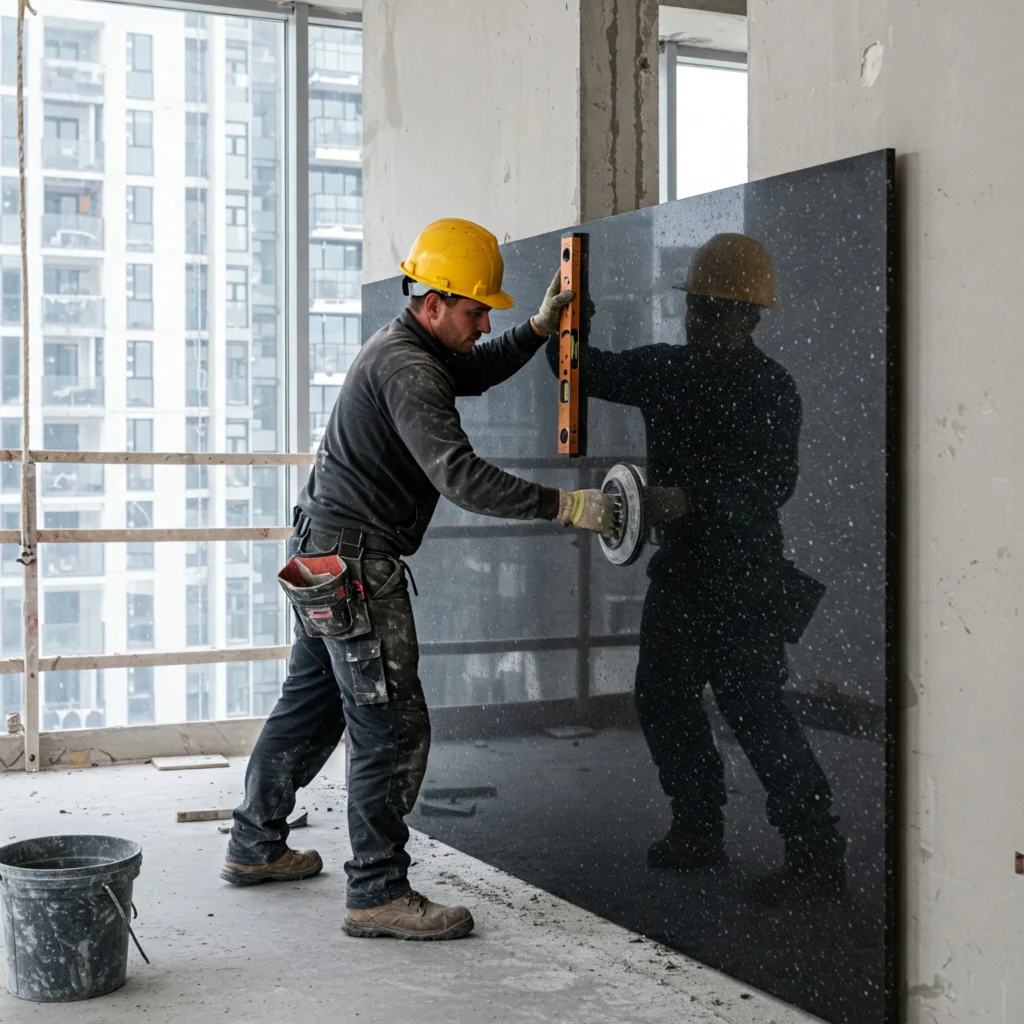
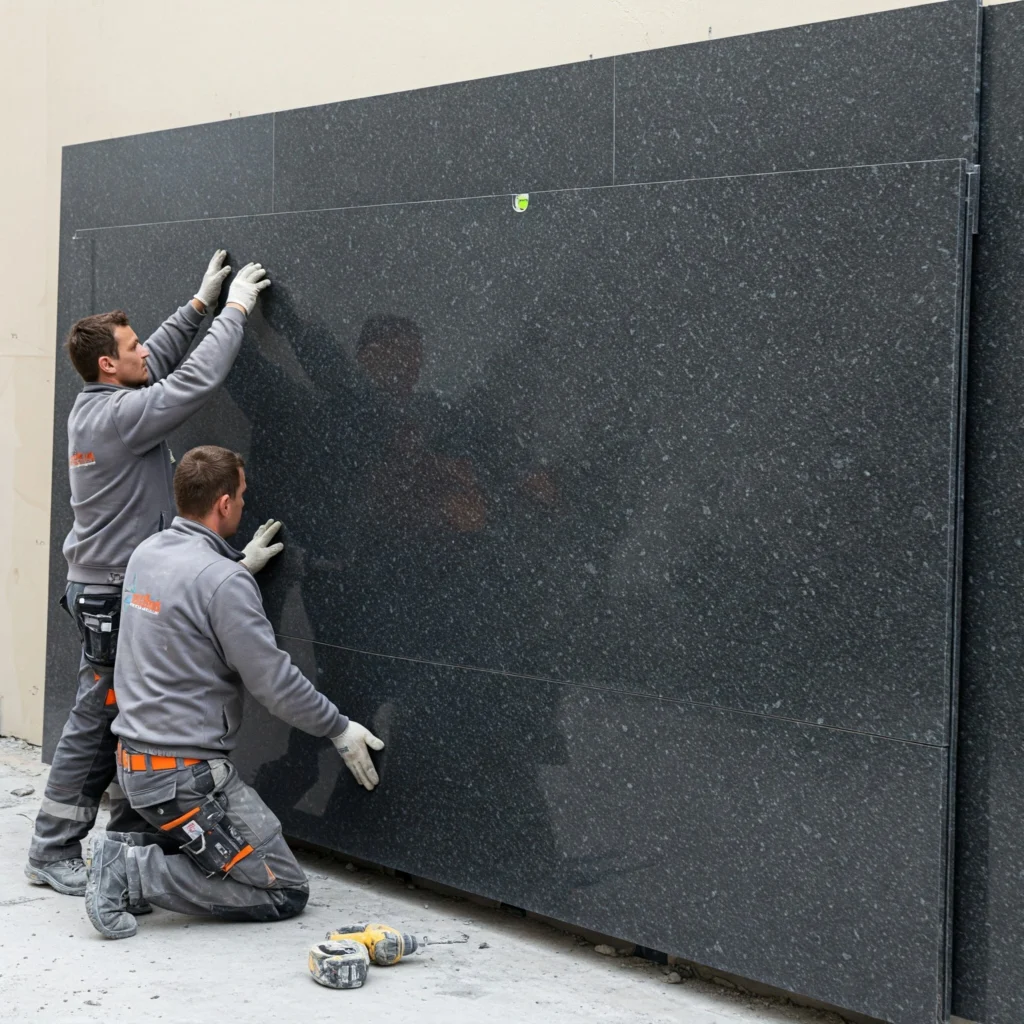
Setting the Slabs: Achieving Perfect Alignment
Large slabs can be very heavy, so get some help. Suction cups make lifting easier. Use shims to keep even grout lines. Make sure the slab is level and straight, or plumb. Avoid any lippage, where one edge sticks out higher than the slab beside it. Paper tags material supplier in Delhi
Gently tap the slabs into place using a rubber mallet. This helps the slab adhere to the thin-set. Careful work creates a professional finish.
Cutting Granite Slabs: Precision Cutting Techniques
Cutting granite requires the right tools and safety measures. A wet saw is great for straight cuts. An angle grinder works for curves. Always use a blade made for cutting granite. Safety glasses and gloves are a must!
Practice on scrap pieces first. This gives you a feel for the tool. Then, slowly cut along your marked lines for a clean, straight edge.
Grouting & Sealing: The Finishing Touches
Grouting and sealing protect your investment. They also make the finished wall look great.
Applying Grout: Filling the Gaps
Select a grout color that you like. Also, make sure you select the right type. Spread it evenly into the grout lines. Remove extra grout with a grout float and sponge. Make sure that you wipe diagonally across the grout lines so you don’t pull out the grout.
Let the grout haze dry and buff it off. A grout bag helps with narrow lines. Now, the wall is coming together!
Sealing Granite: Protecting Your Investment
Granite can stain if you don’t seal it. Sealing protects against water and spills. There are different kinds of sealants. Follow the product’s instructions carefully.
Before you seal the whole wall, test the sealant first. Apply it in a small, hidden area. Allow it to dry fully. This makes sure you like the results. Sealing extends the life of your beautiful granite wall.

Troubleshooting: Common Challenges and Solutions
Even with good preparation, problems can happen. Here are solutions to some common problems.
Slab Cracking: Prevention and Repair
Slabs can crack due to poor installation or bad walls. Improper handling is a main cause of cracks. Small cracks might be repairable with epoxy. But, big cracks may mean replacing the slab.
For example, a homeowner installed granite. But they didn’t prepare the wall properly. The wall shifted, causing a crack. They had to remove the slab and fix the wall before re-installing.
Lippage Problems: Correcting Uneven Surfaces
Lippage happens when one slab edge is higher than another. It can be corrected during the installation. You may also be able to grind down high spots after the mortar has dried.
A lippage tuning system is great for avoiding this problem. This system helps keep the slabs even as you install them. Proper leveling avoids headaches later on.
Grout Discoloration: Causes and Remedies
Grout can change color for many reasons. Efflorescence, a white, powdery substance, is one cause. Stains are another.
Clean the grout with a special grout cleaner. A grout sealer can stop future problems. Regular cleaning helps keep grout looking its best.
Related Blogs: How to Choose the Best Ceramic Tile for Your Bathroom and Kitchen
Conclusion: Admire Your Handiwork
Installing 100×240 cm granite slabs is a big job. It’s achievable with careful planning. Taking your time and paying attention to detail can help you do it yourself. When things get tricky, don’t hesitate to call in a professional. You can transform your home with this project. Enjoy your beautiful new granite slab wall!
Comments
Struggling to find the right PHL63 login page. Finally found it! Sharing it here for you guys: <a href='https://phl63login.com' rel="nofollow ugc">phl63 login</a>. Hope this helps!
Pak92, eh? I've heard some whispers about it. Might need to give it a whirl myself. Anyone else tried it out? Let me know your thoughts! Link's here: <a href='https://pak92.com' rel="nofollow ugc">pak92</a>
Hey, just found Hiii88 the other day! Seems pretty legit so far. Games are smooth and haven't had any issues yet. Hope it stays that way! Check it out here: <a href='https://hiii88.info' rel="nofollow ugc">hiii88</a>
Gave voslotcasino a go. Not the worst, not the best. Could kill some time if you're bored. Worth a shout maybe? <a href='https://voslotcasino.info' rel="nofollow ugc">voslotcasino</a>.
Hey guys, had a blast over at umcassinoonline. It's a fun place to spend some time, you know? Definitely worth a try if you're bored! Go over here: <a href='https://umcassinoonline.com' rel="nofollow ugc">umcassinoonline</a>
[…] Related Blogs: A Beginner’s Guide to Installing 100×240 cm Granite Slabs […]
Fantastic
thank you